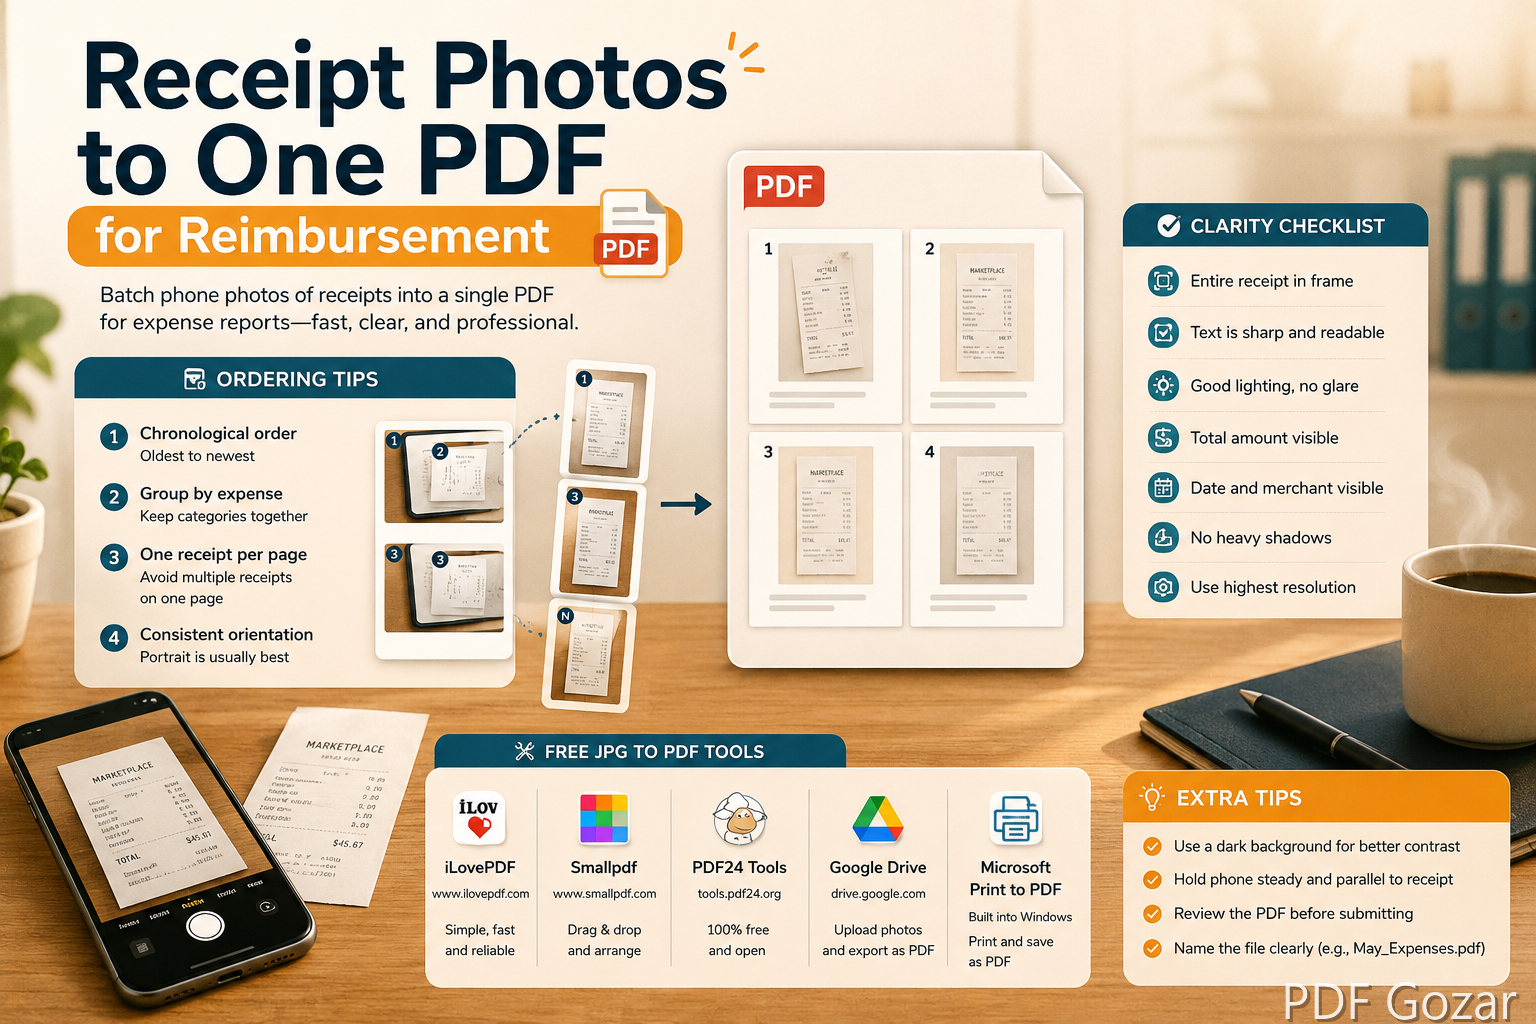
Receipt Photos to One PDF for Reimbursement#
Expense systems want a PDF packet, not twenty images in a chat. Finance teams reject blurry gas receipts, missing totals, and files named image(3).jpg. If you travel, buy team lunches, or run client errands on a card, turning phone photos into one tidy PDF is a weekly chore.
Here is a fast US-office workflow: capture usable photos, convert them, merge into one file, and label it so Approver #2 does not ping you on Friday afternoon.
What Approvers Actually Check#
Most reimbursement reviews look for:
- Merchant name
- Date
- Amount and currency (USD)
- Proof it is a business expense (itemization helps)
- Your name or last four card digits when the policy asks
They do not need artistic food photography. They need the total line and the date readable without zooming into noise. If a line is cut off at the bottom of the frame, expect a rejection even when the meal was clearly for work.
When policies require a business purpose, put that text in the expense report fields—not as a huge sticker on top of the receipt total. Use Edit PDF only for a short cover note if your team allows it.
Capture Receipts Before They Fade#
Thermal paper fades in a hot car. Photograph the same day.
- Lay the receipt flat—unfold crumpled edges.
- Shoot from above; avoid angled “perspective” shots.
- Include the entire receipt, including the footer total.
- For long restaurant tabs, take two overlapping photos rather than one tiny unreadable shot.
- If the receipt is translucent, place it on a dark notebook so print shows through.
- Turn off the harsh flash if it blows out white thermal paper; use even room light instead.
Create an album named Expenses-Aug-2026 so you are not hunting Camera Roll later. After a multi-day trip, sort photos by day before you convert—mixing Monday airfare with Thursday dinner is how packets get sent back for “please reorder.”
Clean the Set Before You Convert#
Delete:
- Accidental pocket photos
- Duplicates (keep the sharpest)
- Personal purchases mixed into the same batch
- Photos of the payment terminal screen when you already have a printed receipt (unless the screen is your only proof)
Crop fingers and table clutter. Rotate every image upright. Rename on desktop if you can: 01-uber.pdf is overkill at photo stage, but 01.jpg, 02.jpg in date order saves merge time.
If two receipts landed in one photo, crop into two images now. Finance would rather see one receipt per page than a collage they have to interpret.
Convert Photos to PDF#
- Open JPG to PDF.
- Upload receipt images in chronological or report order (select multiple if the tool allows, or add in sequence).
- For expense packs, choose US Letter page size and Email-smaller quality when the portal has tight upload limits.
- Download the PDF.
- Spot-check that each total is legible on a laptop screen—not only on your phone.
If your phone saved PNG screenshots of digital receipts (Uber, Amazon, airline), use PNG to PDF the same way. Keep digital screenshots and paper photos in separate batches if that helps you stay organized, then merge at the end.
One Trip, One Packet: Merge Batches#
When you convert in groups (Monday flights, Tuesday meals):
- Make a small PDF per day or category.
- Combine with Merge PDF.
- Final name example:
Expense-Q3-ClientVisit-Chicago-JordanLee.pdf.
Some portals allow only one attachment. Merging is not optional there—it is the whole job. If you accidentally included a personal coffee receipt, split it out with Split PDF and re-merge the clean set instead of hoping nobody notices page 7.
Clarity Checklist (Print This Mentally)#
Before you upload to Concur, Expensify, Ramp, or email finance:
- Every page shows merchant, date, and total
- Long receipts are fully captured (or split across two clear pages)
- Pages are upright and in report order
- Personal charges are removed
- Filename includes trip or project and your name
- File opens on a laptop; totals are readable without pinch-zoom guesswork
- Alcohol or out-of-policy lines are handled per handbook (removed or noted)
If the checklist fails on one receipt, retake or replace that page only—do not rebuild the entire trip packet from scratch.
When File Size Becomes a Problem#
Ten glossy 12MP photos can exceed portal limits or bounce in email. If upload fails:
- Re-export fewer photos per PDF and merge after lightly resizing images.
- Follow How to Shrink a PDF Under 25MB for Gmail if you must email finance.
- Prefer the company’s Concur / Expensify / Ramp upload over email when available.
- Export pages with PDF to JPG, resize to a reading-friendly long edge, then rebuild with JPG to PDF if the portal still complains.
Do not black-bar the total to “save space.” That guarantees rejection.
Add Light Context (Optional)#
Policies differ. If allowed, use Free PDF Editor to add a one-line note on a cover page: project code, client name, or “Team lunch — 4 attendees.” Do not cover the merchant total with your annotation.
For digital receipts that arrived as PDF already (hotels, SaaS invoices), skip photos—merge those PDFs with your photo-based packet so everything sits in one file. Put hotel folios first if your report groups lodging separately; match whatever order the expense lines use so approvers can skim in parallel.
Before / After: Client Visit Week#
Before: Nineteen Camera Roll photos, three personal Target runs mixed in, two upside-down parking stubs, and a Slack message saying “receipts coming.”
After:
- Delete personal and duplicate shots; crop and rotate the rest.
- Convert day batches with JPG to PDF and PNG to PDF for app screenshots.
- Merge into
Expense-Q3-ClientVisit-Chicago-JordanLee.pdfwith Merge PDF. - Add a one-page cover note in Edit PDF with the project code if your team wants it.
- Upload once to the expense tool and keep the PDF until reimbursement clears.
That packet usually survives first-pass review. The messy Camera Roll version usually does not.
Policy Gotchas in US Workplaces#
- Alcohol may be excluded or capped—check before you submit.
- Itemized restaurant receipts beat credit-card stubs that show only a tip-inclusive total.
- Mileage is usually a log, not a gas receipt—do not substitute one for the other unless policy says so.
- Personal cards vs corporate cards may require different portals.
- Submit within the deadline (often 30–60 days). A perfect PDF late can still be denied.
- Per diems may replace meal receipts entirely—do not upload a food packet if your trip is per diem only unless finance asked for backup.
When policy and your manager disagree, get a written exception. Your tidy PDF cannot override a hard rule in the handbook.
Troubleshooting Rejections#
- “Receipt not itemized”: Replace the card stub with the detailed restaurant copy, or add the itemized email/PDF from the merchant and merge it in.
- “Date unclear”: Retake under better light; thermal fade may already be too far gone—ask the merchant for a reprint while you still can.
- “Multiple expenses on one page”: Split into separate images, reconvert, and merge so each expense line maps to one page.
- “Wrong file type”: Portals that want PDF will bounce a folder of JPGs—convert first with JPG to PDF.
- “Attachment too large”: Lighten images and rebuild, or split the trip into two PDFs only if the portal allows multiple uploads.
FAQ#
Do I need every SKU line visible?#
For meals and hotels, itemization helps. For a flat parking garage ticket, merchant + date + total is usually enough. Follow your employee handbook.
Can I submit screenshots of Apple Pay?#
Yes if the screenshot shows merchant, date, and amount. Crop the rest of your notification shade. Convert with PNG to PDF.
What if two receipts are on one photo?#
Crop into two images before converting, or finance may reject the page as unclear. One receipt per page is the safe default.
Should tips be included?#
Include the final charged amount your card actually paid. If policy reimburses pre-tip only, say so in the report notes and follow the written rule.
Can I mix hotel PDFs with phone photos?#
Yes. Keep each source clear, then merge into one packet so the approver downloads a single file.
Next Step#
Gather this week’s receipt photos, convert with JPG to PDF, and combine trips with Merge PDF. One labeled packet gets you paid faster than a thread of unreadable images—and keeps you out of the Friday expense chase.